
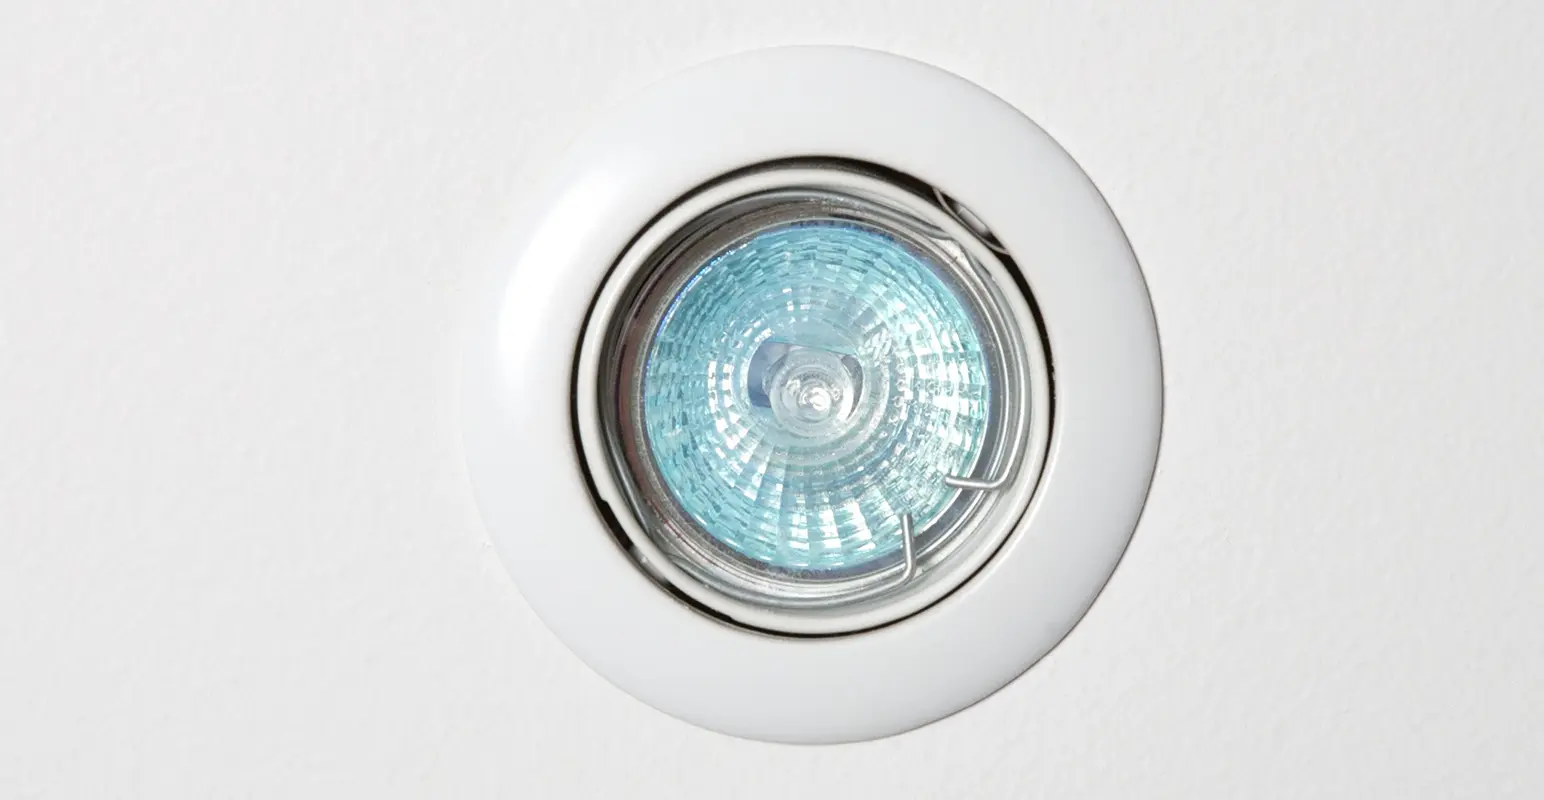
There are several different types of light fittings found in homes, including GU10 spotlights, screw-fit bulbs (Edison Screw), bayonet cap bulbs and enclosed bathroom light fittings. Before purchasing a replacement, check the type of bulb currently fitted or take the old bulb to a local DIY store for advice.
Before you start
- Switch the light off.
- Turn off the relevant lighting circuit at the fuse box for added safety.
- Use a step ladder if needed and make sure you can reach the fitting safely.
- Allow the bulb to cool completely before touching it.
Replacing a GU10 LED Spotlight Bulb (the most common)
- Switch off the light and allow the bulb to cool.
- For added safety, turn off the lighting circuit at the fuse box.
- If fitted, remove the retaining ring holding the bulb in place.
- Grip the bulb and rotate it anti-clockwise about a quarter turn.
- Pull the bulb down and out of the fitting.
- Insert the new GU10 bulb, aligning the pins with the slots.
- Push the bulb up and turn it clockwise until it locks into place.
- Refit the retaining ring if required.
- Restore power and test the light.
Replacing a Screw-Fit (Edison Screw) Bulb
- Hold the bulb firmly. Turn the bulb anti-clockwise until it comes free from the fitting.
- Insert the replacement bulb and turn it clockwise until secure.
- Restore power and test the light.
Replacing a Bayonet Cap Bulb
- Gently push the bulb upwards.
- Turn it anti-clockwise until it releases from the fitting.
- Insert the replacement bulb by aligning the pins with the slots.
- Push up gently and turn clockwise until locked in place.
- Restore power and test the light.
Bathroom and Enclosed Light Fittings
Some bathroom and moisture-resistant light fittings have a protective cover that must be removed before the bulb can be accessed.
- Ensure the light is switched off and has cooled down.
- Carefully unscrew or unclip the cover, depending on the fitting type.
- Remove and replace the bulb using the appropriate method above.
- Refit the cover securely before restoring power.
- Test the light to ensure it is working correctly.
If the Spotlight Doesn't Twist Out
Some LED spotlights use:
- Spring clips
- Push-fit connectors
- Integrated LED units
In these cases, the entire fitting may need to be removed and replaced rather than just the bulb. If you're unsure, don't force it. Check the fitting for a model number or take a photo and compare it with replacement products.
Safety First
Only replace bulbs that are designed to be user-replaceable. If the fitting is damaged, the wiring is exposed, or you're unsure how it is installed, report it or seek assistance rather than attempting the repair yourself.
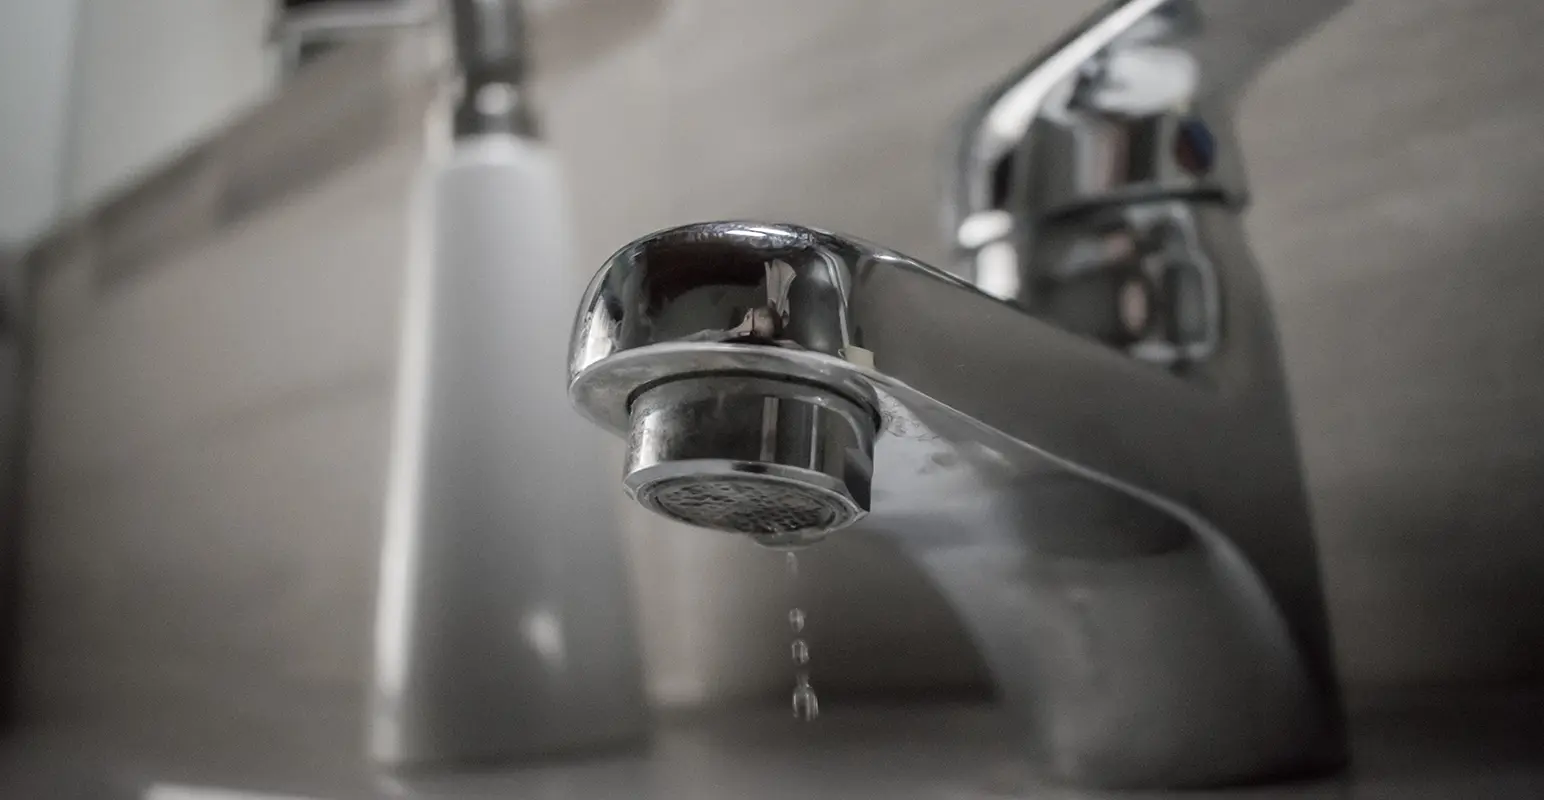
Leaks can occur for a variety of reasons, most commonly from plumbing systems such as pipes, taps, toilets and appliances. While some leaks are easy to identify, others can be hidden behind walls, beneath floors or around fixtures and fittings.
If you notice signs of a leak but cannot identify the source, it may be caused by:
- A leaking roof
- A damaged waste pipe
- A leaking toilet cistern
- Hidden plumbing pipework
What to Do If You Discover a Leak
- If possible, stop the flow of water by turning off the main stopcock or the isolation valve serving the affected pipe or appliance.
- If you cannot access the water supply, place a container underneath the leak to catch any water and help prevent further damage.
- For small pipe leaks, wrap a towel around the affected area to absorb water until the issue can be addressed.
- Move any furniture, electrical items or personal belongings away from the affected area where it is safe to do so.
- Report the repair using th form at the top of this page as soon as possible.
Prompt action can help minimise damage to your home and reduce the risk of further problems developing.
If you experience a loss of electricity in your home, there are a few common causes that you can check before reporting the issue.
Check These First
1. Check your electricity meter
If you have a prepayment meter, make sure you have enough credit available. If you believe the meter is faulty, contact your energy supplier.
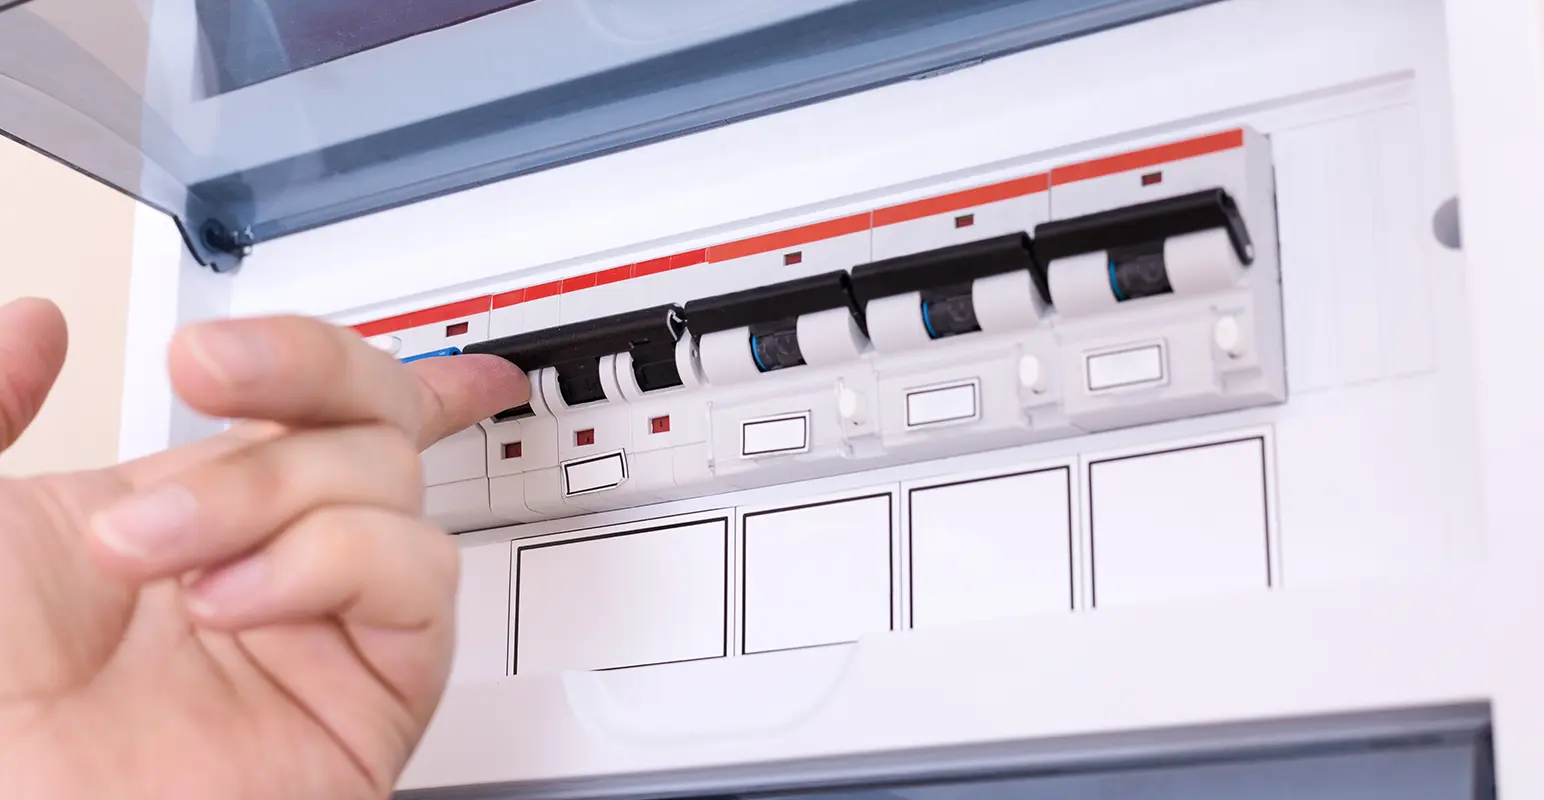
2. Check your fuse box (consumer unit)
A loss of power may be caused by a tripped circuit breaker. Open your fuse box and look for any switches that are in the "off" position or sitting lower than the others. Reset the switch by moving it fully off and then back on.
If the breaker trips again immediately, unplug any recently used appliances and try again. If the problem persists, there may be a fault with an appliance, wiring or the electrical installation.
3. Check if there is a local power cut
If neighbouring properties, streetlights or nearby buildings are also without power, there may be a power outage affecting your area.
You can check for local power cuts and receive updates by calling 105, a free national service that connects you to your local electricity network operator.
During a Power Cut
If there is a power outage:
- Switch off electrical appliances that should not be left unattended.
- Leave one light switched on so you know when power has been restored.
- Keep fridge and freezer doors closed where possible.
- Check on neighbours who may need assistance, particularly older or vulnerable residents.
- Keep warm and use battery-powered torches rather than candles whenever possible.
When to Report the Issue
If you have checked your meter, fuse box and local power supply and still have no electricity, or if you suspect a fault within your property, please report the issue so we can advise on the next steps.
Colder weather can place additional strain on your home and increase energy costs. Taking a few simple steps before winter arrives can help keep your home warm, reduce the risk of repairs and improve energy efficiency.
Top Winter Preparation Tips
Service your boiler
A well-maintained boiler is safer, more efficient and less likely to break down when you need it most. If you rent your home, please ensure you provide access for annual gas safety inspections. Homeowners should always use a Gas Safe registered engineer to service their boiler.
Test your heating system
Turn your heating on before the cold weather arrives and check that all radiators heat up properly. If you notice any issues, report them as soon as possible so they can be addressed before winter sets in.
Bleed radiators if necessary
If a radiator feels cold at the top but warm at the bottom, it may contain trapped air. Bleeding the radiator can improve efficiency and help your heating system work more effectively.
Reduce draughts
Check around doors, windows and loft hatches for draughts. Draught-proofing strips and door seals are inexpensive ways to reduce heat loss and lower energy bills.
Review your energy usage
Simple changes such as lowering your thermostat by one degree, using heating controls effectively and switching off appliances when not in use can help reduce energy costs. If you pay your own energy bills, consider checking whether a different tariff may offer better value.
Protect exposed pipework
Frozen pipes can burst and cause significant damage. Where accessible, ensure external or unheated pipes are insulated with suitable pipe lagging.
Check your home insurance
Make sure your contents insurance is up to date and provides adequate cover for accidental damage, weather-related incidents and emergencies.
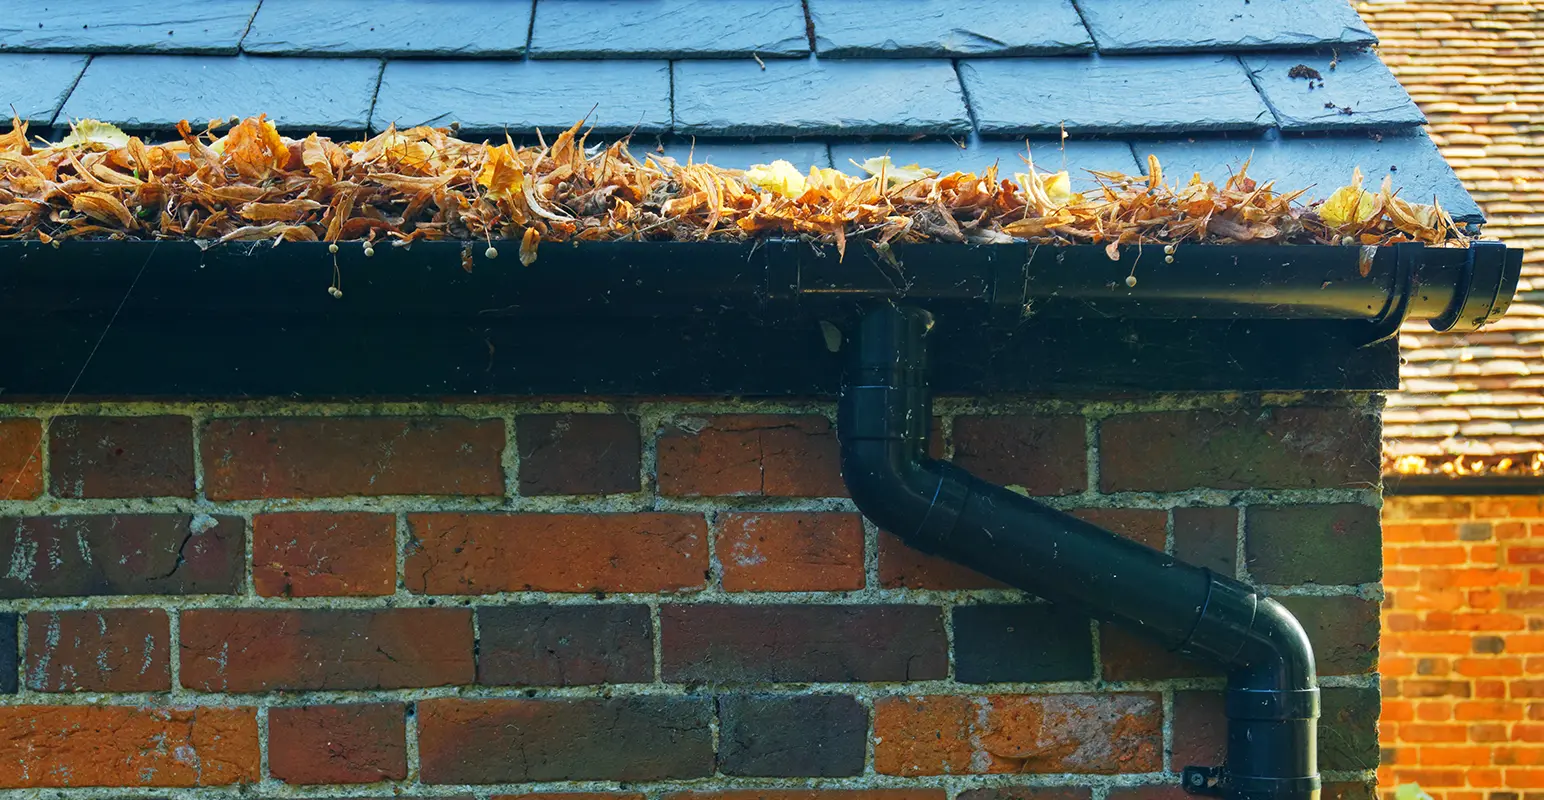
Keep gutters and drains clear
Blocked gutters and downpipes can lead to overflowing water, damp and leaks. If you notice overflowing gutters, damaged downpipes or signs of water ingress, report the issue promptly.
Help with Energy Costs
There are a range of government schemes and support programmes that may help eligible households with their energy bills during the winter months.
Depending on your circumstances, you may qualify for support through schemes such as:
- Warm Home Discount
- Winter Fuel Payment
- Cold Weather Payments (where applicable)
- Local authority hardship funds
- Energy supplier support schemes
Eligibility criteria and payment amounts can change, so we recommend checking the latest information on the Government website or speaking directly with your energy supplier.
Staying Safe and Warm
During periods of very cold weather:
- Keep your home heated where possible.
- Open curtains during the day to let sunlight in and close them at night to retain heat.
- Keep internal doors closed to retain warmth.
- Check on elderly, vulnerable or isolated neighbours and relatives.
- Ensure smoke alarms and carbon monoxide alarms are tested regularly.
Taking a little time to prepare your home now can help prevent problems later and ensure you stay safe, warm and comfortable throughout the winter months.
If you have lost your heating or hot water, there are a few simple checks you can carry out before reporting a repair. Many issues can be resolved quickly without the need for an engineer visit.
Check These First
Check your energy supply
If you have a prepayment meter, make sure you have enough credit available. If your gas or electricity supply has stopped, topping up the meter may restore your heating and hot water.
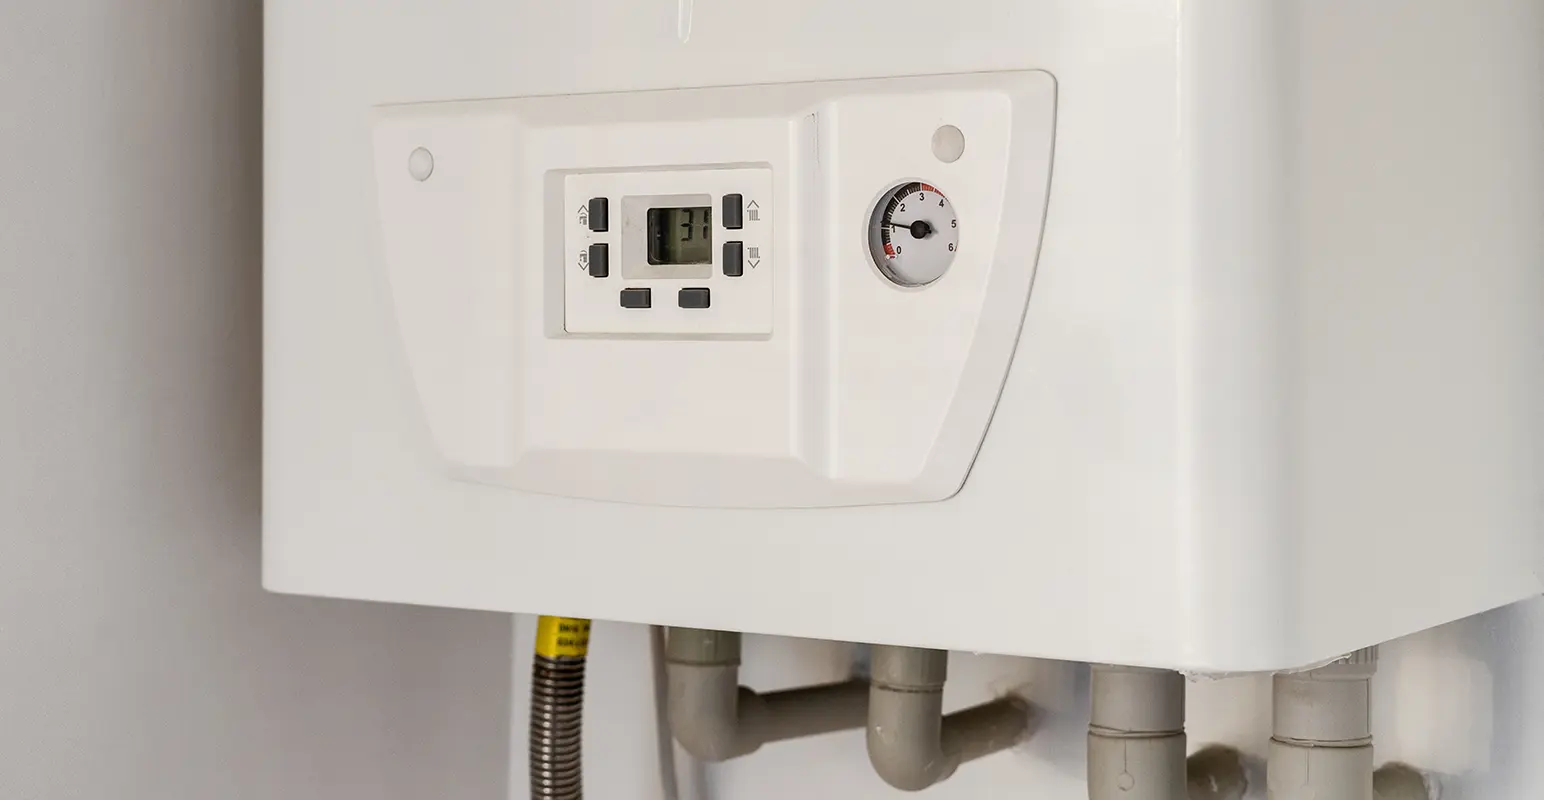
Check your boiler pressure
Most boilers operate best at a pressure of between 1 and 2 bar. If the pressure gauge is showing below 1 bar, your boiler may need repressurising. Refer to your boiler manufacturer's instructions if you are unsure how to do this.
Check your thermostat and programmer
Make sure:
- Your heating and hot water are switched on.
- The programmer or timer is set correctly.
- The room thermostat is set above the current room temperature.
- Any hot water cylinder thermostat is set to around 60°C.
Reset your boiler
Many modern boilers have a reset button. If your boiler is displaying a fault code, consult the manufacturer's guidance and, if appropriate, try resetting the boiler.
Check for a power cut
If your boiler is not receiving power, check your fuse box and confirm there are no local power outages affecting your area.
When to Report a Repair
If you have carried out these checks and still have no heating or hot water, please report the issue as soon as possible using the form at the top of this page.
We are committed to providing homes that are safe, warm and dry. Damp, mould and condensation can affect both your home and your health, so it is important that any concerns are reported as soon as possible.
If you notice signs of damp, mould or persistent condensation, please let us know straight away. These issues can sometimes be caused by defects within the property, such as leaks, inadequate ventilation or building defects, and early reporting allows us to investigate and address the problem promptly.
Our Responsibilities
When damp, mould or condensation is reported, we will:
- Inspect your home and assess the issue.
- Identify the cause of the problem.
- Carry out any repairs or remedial works that are our responsibility.
- Provide advice and guidance to help reduce condensation and prevent mould growth.
Your Responsibilities
To help us resolve issues quickly, we ask that you:
- Report damp, mould or condensation as soon as it is identified.
- Allow access for inspections, repairs and follow-up visits.
- Inform us of any changes or alterations that may affect ventilation within your home.
Understanding Condensation
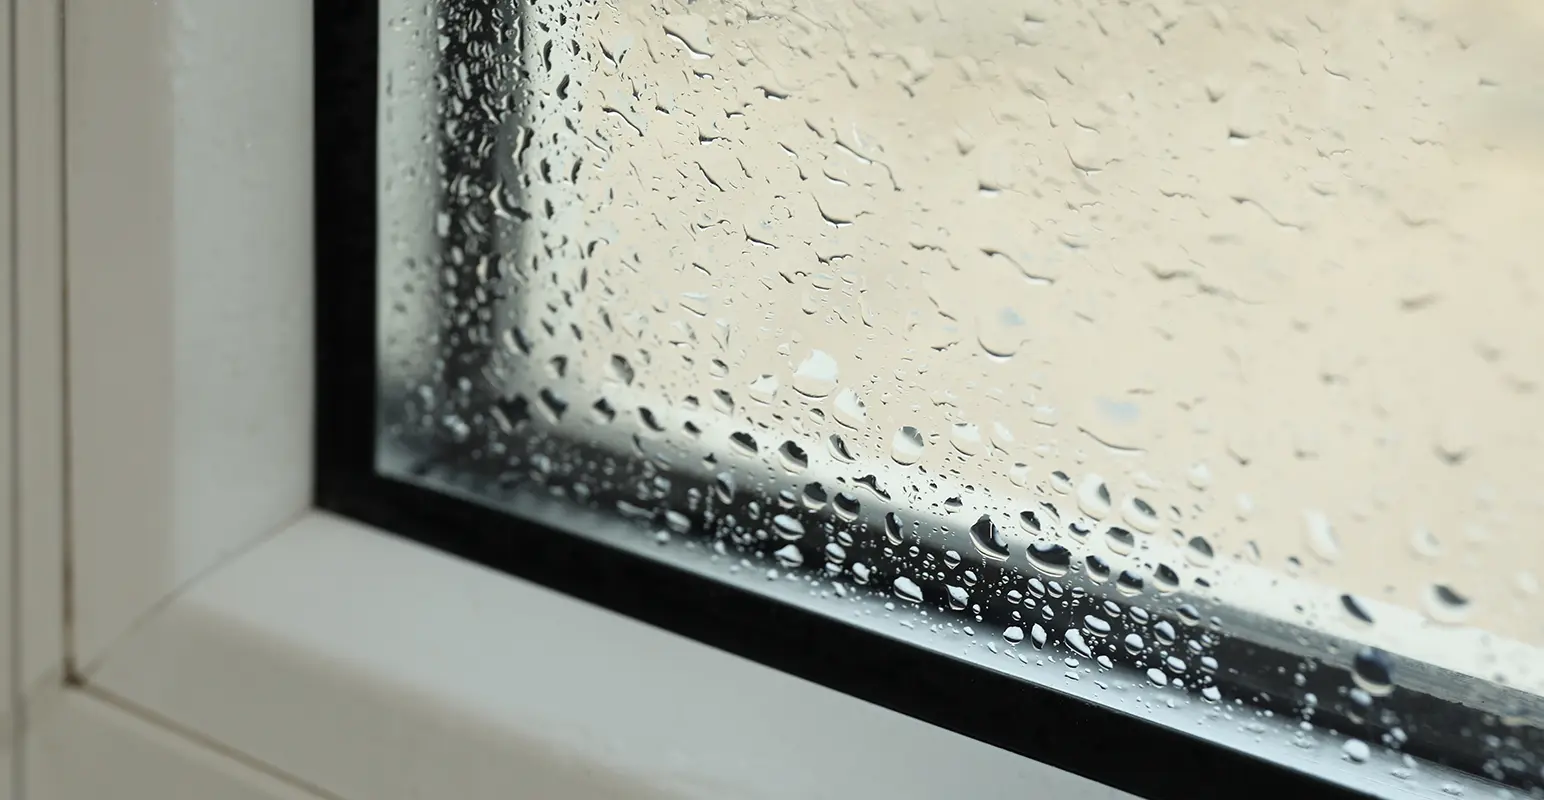
Condensation occurs when warm, moist air comes into contact with colder surfaces such as windows, external walls or tiles. If left untreated, condensation can lead to damp and mould growth.
It is most commonly found in areas where moisture is regularly produced, such as kitchens, bathrooms and rooms where clothes are dried indoors.
Reducing Condensation and Mould
In the Kitchen
- Use extractor fans whenever cooking, boiling kettles or washing up.
- Keep lids on pans where possible to reduce the amount of moisture released into the air.
- Open windows when safe to do so to improve ventilation.
- Keep kitchen doors closed while cooking to prevent moist air spreading through the property.
In the Bathroom
- Use extractor fans during and after bathing or showering.
- Open windows where possible to help remove excess moisture.
- Wipe down wet surfaces after use to reduce condensation build-up.
Around the Home
- Ventilate your home regularly by opening windows when weather and security permit.
- Avoid drying clothes directly on radiators where possible.
If drying clothes indoors, use a well-ventilated room and keep a window slightly open if safe to do so. - Leave a small gap between furniture and external walls to allow air to circulate.
- Wipe away condensation from windows, sills and other cold surfaces.
- Avoid overfilling wardrobes and cupboards, as restricted airflow can encourage mould growth.
- Maintain a consistent, comfortable temperature throughout your home where possible.
- Ensure tumble dryers are vented correctly or that condenser units are emptied regularly.
Reporting Damp and Mould
If you notice mould growth, damp patches, peeling wallpaper, musty smells or persistent condensation, please report it as soon as possible using the form at the top of this page. Early intervention can help prevent the issue from becoming more serious and protect both your home and your health.
Many minor blockages can be cleared without specialist tools or plumbing experience. Before reporting a repair, you may wish to try the simple steps below.
How to Unblock a Toilet
A blocked toilet can be inconvenient, but in many cases the blockage can be cleared using a plunger.
Before you start:
Do not continue flushing the toilet, as this may cause it to overflow and make the problem worse.
You will need:
- Rubber gloves
- A toilet plunger
Steps:
- Put on your gloves and place the plunger firmly over the toilet outlet to create a seal.
- Gently push and pull the plunger to create suction. Avoid plunging too aggressively, as this may cause water to splash.
- Continue until the water level begins to fall and the blockage clears.
- Flush the toilet once to check that the water drains away normally.
- Flush a second time with a small amount of toilet tissue to ensure the blockage has been fully removed.
- Check around the base of the toilet for any signs of leaks.
If the toilet remains blocked after several attempts, please report the issue.
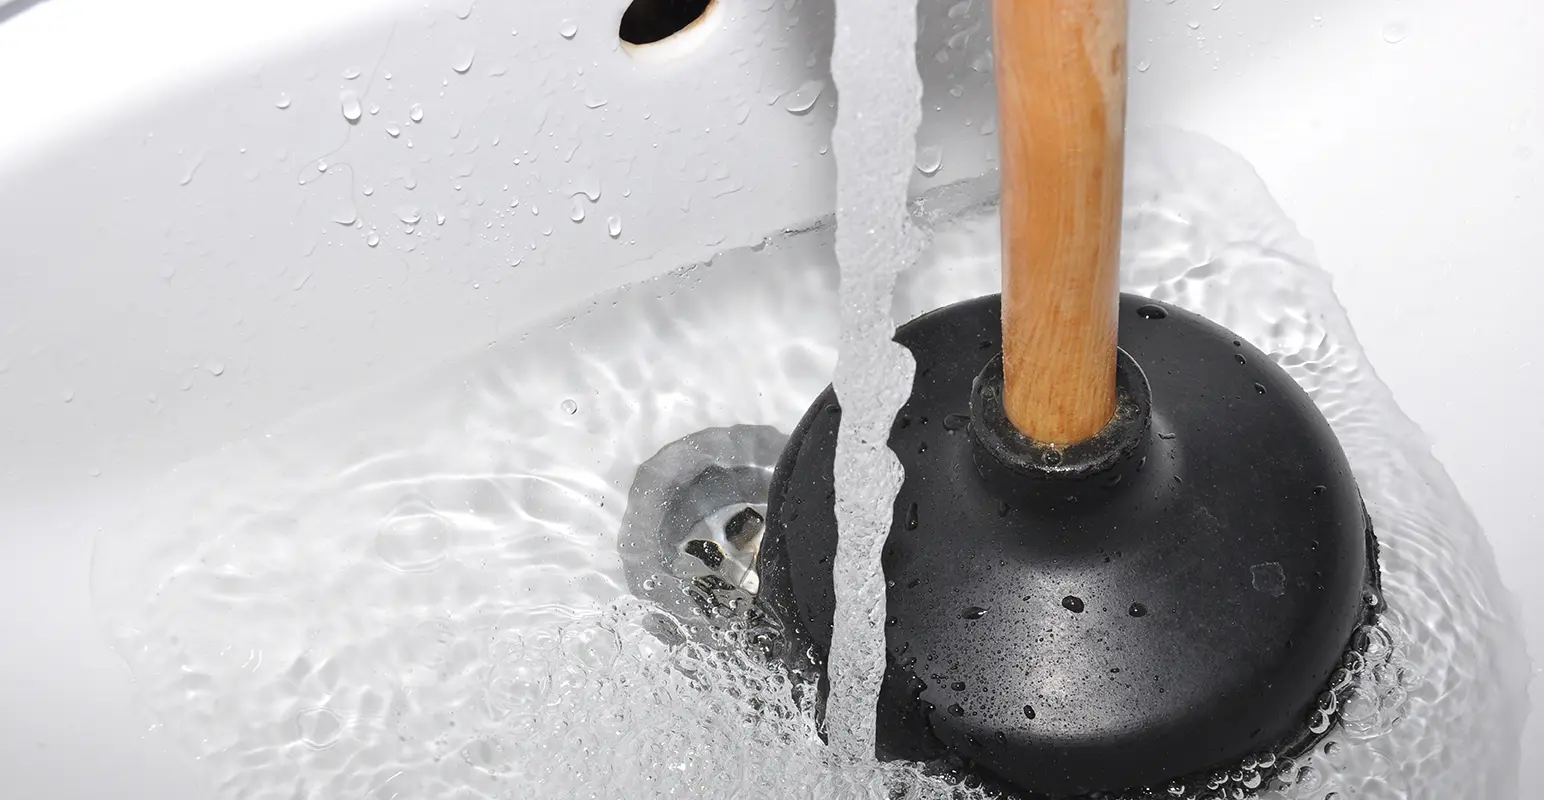
How to Unblock a Sink
Blocked sinks are often caused by a build-up of grease, soap, food waste or hair.
You will need:
- Rubber gloves
- A sink plunger
- An old cloth or towel
Steps:
- Remove any visible debris from the plughole.
- Partly fill the sink with enough water to cover the base of the plunger.
- Block the overflow opening using a cloth or towel to help create a strong seal.
- Place the plunger over the plughole and pump up and down several times.
- Remove the plunger and check whether the water drains away freely.
- Repeat if necessary until the blockage clears.
A Note About Chemical Drain Cleaners
Chemical drain cleaners are available from many DIY stores, but they should be used with caution and only in accordance with the manufacturer's instructions. These products can be hazardous and may damage pipework if used incorrectly.
When to Report a Repair
If you have tried the steps above and the blockage remains, or if water is backing up from multiple drains, please report using the form at the top of this page.